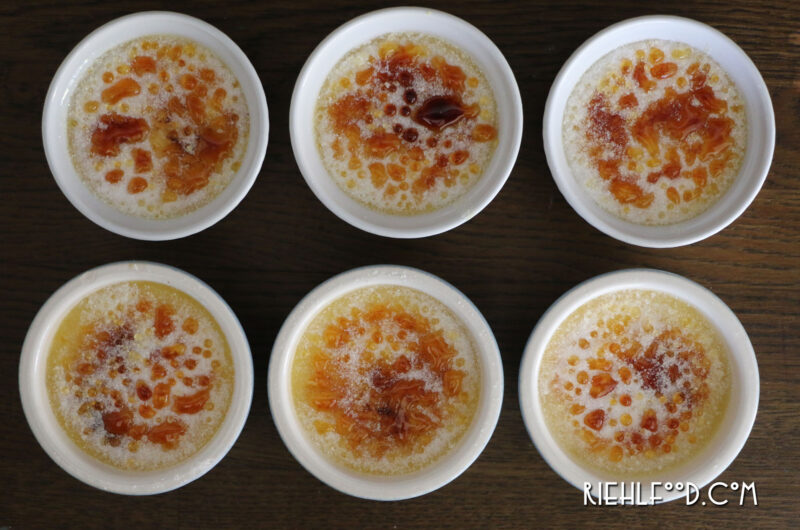
Crème Brûlée
Servings
6
servingsPrep time
30
minutesCooking time
40
minutesIngredients
- CUSTARD:
2 cups heavy cream
10 tablespoons sugar, divided
1 vanilla bean (1 teaspoon vanilla extract)
4 large egg yolks
1/2 teaspoon vanilla extract
1/4 teaspoon kosher salt
- TOPPING:
4 tablespoons sugar (2 teaspoons per ramekin)
Directions
- Preheat oven to 325°F with a rack in the middle position
- Arrange six 4-ounce ramekins in a 9×13 baking dish and set aside.
- Split the vanilla bean in half and scrape out the seeds with the dull (non-cutting) side of a paring knife.
- In a medium saucepan, combine heavy cream, 4 tablespoons of the sugar, vanilla bean pod, vanilla bean seeds, and salt. Cook over medium heat, until it begins to simmer.
- Once the cream begins to simmer, remove the pan from heat, cover, and let stand for 15 minutes to allow the vanilla bean to infuse into the cream. (If you’re replacing the vanilla bean with vanilla extract, skip this step.)
- When your cream is almost done infusing, separate your eggs. Place the yolks in a medium-sized mixing bowl; save the whites for another purpose.
- Whisk the remaining 6 tablespoons of sugar into the yolks. (Don’t combine the eggs and sugar too soon before you mix it with the warm cream because the sugar binds with the water in egg yolks, which constricts the proteins in yolks and creates eggy lumps. And you don’t want eggy lumps in your custard!)
- While whisking the yolks continuously, slowly add one ladle (about 1/4 or 1/3 cup) of hot cream in a thin stream. Do this two or three more times.
- While whisking, slowly add the remaining cream to the egg mixture, followed by the vanilla extract.
- Strain the mixture through a fine mesh sieve into a second mixing bowl and discard the vanilla bean pod (this also helps strain out any small bits of egg that may have curdled).
- At this point, the custard can be cooled and stored for up to 5 days. If you choose to bake them right from the fridge, you will probably need to add a couple of extra minutes.
- Divide the custard between the ramekins, filling each one just up to the inner rim, or about three-quarters of the way full.
- Bring a kettle or pot of water to a boil. Fill the pan with the hot water until the water comes about two-thirds of the way up the side of the ramekins. Avoid splashing water into the custards.
- Transfer the pan with the custards to the oven and bake for 35 to 40 minutes. When ready, the crème brûlée should have a uniform jiggle in the middle; when you touch the center, it should spring back just a bit. If the sides hold firm but the center sloshes, they aren’t quite done yet.
- Remove the baking dish with the finished custards from the oven and set on a wire cooling rack. Let the custards cool in the water until you can safely pick up the ramekins.
- Once removed from the water bath, let each custard rest on the cooling rack for about 15 more minutes. Use a spoon to skim any bubbles off the top, then cover each ramekin with plastic wrap and store in the fridge.
- When ready to serve, remove the custards from fridge. Sprinkle the surface of each custard evenly with about 1 teaspoon of granulated sugar. Rotate the custard as you sprinkle to make sure the sugar evenly coats the surface.
- Ignite your torch. Hold the flame about 4 inches from the surface of the sugar. Using a circular motion, move the flame across the surface. The sugar will at first begin to bead up, and then will eventually solidify into a hard sugar crust.
- You want to make sure all the sugar granules have melted, and the sugar has at least a tint of caramel color. The longer you torch the surface, the darker it will become and the more bitter the sugar crust will be.
- Sprinkle each of the custards with an additional teaspoon of sugar and brûlée the surface again.
Recipe Video
Notes
- Recipe courtesy of https://www.simplyrecipes.com/recipes/how_to_make_creme_brulee/
Did you make this recipe?
Tag @riehlfood on Instagram and hashtag it #riehlfood
Like this recipe?
Follow us @riehlfood/riehl-food/ on Pinterest
Did you make this recipe?
Like us on Facebook

